
How to Tell if a Chicken Egg Is Fertile With a Step-By-Step Guide
Are you trying to hatch your own eggs but unsure how to tell if they’re fertile? You’re not alone—many people struggle with figuring out which eggs are viable for incubation. Knowing how to identify a fertilized egg can save you time and effort, and increase your chances of a successful hatch.
To check if a chicken egg is fertile, start by collecting fresh eggs and marking them with the date.
Use a flashlight or candling light to look inside in a dark space around days 7, 10, or 14 of incubation.
You’ll see blood vessels and a dark embryo spot if the egg is fertile.
Clear eggs with no veins are infertile.
Keep exploring for detailed tips to accurately identify fertility and guarantee successful hatching.
Key Takeaways
- Candle the egg around days 7-10 to see if there are blood vessels and embryo development.
- During candling, look for a dark, defined embryo spot and a network of blood vessels.
- If the egg is unfertilized, it will look clear without any veins or embryo movement.
- Keep an eye out for a blood ring or veins that are fading. These can be signs that the embryo has died early.
- To confirm if the embryo is developing properly, check the egg again with candling in the following days.
How to Tell if an Egg Is Fertile and When to Candle

Determining whether an egg is fertile isn’t just about how it looks on the outside because fertilized and unfertilized eggs look identical externally. You need to check inside to be sure.
Candling is the best way to do this, especially between days 7 and 10 of incubation. During candling, you’ll see signs of a fertilized egg, like blood vessels spreading out from the embryo and a dark spot indicating embryo development.
If the egg is fertilized, an embryo forms, and blood vessels become visible, showing healthy growth. Moving too early, before day 7, might not reveal these signs.
Understanding How Fertilization Occurs in Chickens
Fertilization in chickens happens inside the hen’s oviduct when sperm from a rooster meets the yolk before the eggshell forms. During this process, the sperm travels to the germinal disc, a small spot on the yolk’s surface, where fertilization occurs.
If fertilized, the germinal disc develops into an embryo, which is essential for incubation. The hen can store sperm in specialized glands for over three weeks, allowing multiple eggs to be fertilized from a single mating.
Typically, fertilization happens about 24 hours before the hen lays the egg. Eggs laid immediately after mating are usually unfertilized, but those laid days later are more likely to contain a fertilized germinal disc, making successful incubation possible.
The Best Times to Candle Eggs During Incubation
Candle eggs at specific points during incubation to monitor embryo development and make sure they’re progressing as expected. The best times to do this are on days 7, 10, and 14.
On day 7, candling shows early signs of fertility, like blood vessels and a visible embryo. By day 10, the embryo is more developed, with clearer blood vessels and a larger size.
On day 7, you’ll see blood vessels and a tiny embryo, indicating early fertility.
The final key candling time is around day 18, during lockdown, when the embryo is nearly ready to hatch but hatching hasn’t started yet. After day 18, avoid opening the incubator to prevent disrupting the process.
These important candling points help you track embryo progress, identify fertile eggs, and ensure a successful incubation.
Tools and Techniques for Egg Candling Safety and Effectiveness
Using the right tools and techniques is key for safe, effective egg candling. You’ll want a small, bright egg candler or flashlight and a dark room to see inside without harming the embryo.
Gently hold the egg upright, small end down, and avoid shaking to protect the developing embryo. Limit candling to 2 or 3 times before day 18 to reduce any risks.
A proper dark environment makes it easier to see internal features like veins, the air cell, and embryo movement. Proper handling and good lighting are essential for clear, safe inspection.
| Tool/Technique | Purpose |
|---|---|
| Bright egg candler/flashlight | Illuminates the egg safely and clearly |
| Dark room | Helps you see internal structures better |
| Gentle handling | Prevents harm to the embryo during inspection |
Step-by-Step Guide to Candling Your Eggs Properly
To start candling your eggs properly, find a dark room and get a bright, focused light source ready.
Hold the egg upright with the small end down, keeping it close to the light for the clearest view.
Gently examine the egg for blood vessels, embryo spots, and movement to see if it’s fertile.
Preparing for Candling
Before you start candling your eggs, it’s important to prepare your workspace and gather the necessary tools. Candling works best in a dark room, so pick a space where you can control the lighting easily.
Make sure you have a bright light source, like a flashlight or an egg candler, ready to shine inside the egg. Wash your hands thoroughly beforehand to keep everything clean and prevent contamination.
When handling the egg, hold it gently upright with the small end down. Use minimal pressure to avoid damaging the shell, which helps you see the internal features more clearly.
Setting up your workspace with these steps ensures maximum visibility and safety during candling. It makes it easier to check for fertility and development inside the egg.
Proper Candling Technique
Now that your workspace is set, it’s time to focus on the proper candling technique. Choose a small, bright flashlight or a specialized egg candler and do your candling in a dark room so you can see clearly.
Hold the egg gently upright with the small end down. Lightly press it against the light source while keeping your hand steady to avoid shaking.
Carefully observe the inside of the egg for veins, which show a fertilized egg, along with a dark embryo spot and signs of movement between days 7 and 14 of incubation.
Check the size of the air cell and the clarity of the yolk. Limit candling to 2-3 times before day 18, and handle the egg gently to avoid damaging the developing embryo.
How to Recognize Fertile and Infertile Eggs by Candling
Candling eggs is a simple way to see if they are fertile or infertile by checking their internal development. During candling, fertile eggs will show visible veins and a dark spot where the embryo is growing early on.
In contrast, infertile eggs look see-through with no veins or signs of embryo development, so they are easy to spot. You should look for a network of blood vessels spreading from the embryo, which shows fertility.
If you see a blood ring or the blood vessels are fading, it means the embryo has died. Candling around 7 to 10 days helps you see embryo movement and blood vessel growth clearly.
Good lighting and darkness are important to reveal these internal features, especially in dark-shelled eggs.
Common Egg Candling Problems and What They Mean
When candling eggs, faint or missing veins can be confusing. Usually, they mean the embryo isn’t developing properly or the egg wasn’t fertilized to begin with.
Blood rings are a clear sign that fertilization happened, but the embryo died early. Dark or opaque eggs often indicate mold or bacterial problems.
Recognizing these issues helps you figure out if an egg is still good or if it should be discarded.
Faint Veins or No Veins
Faint veins seen during candling often suggest that the egg is either in the early stages of development or that the embryo is weak. If you notice faint veins, it’s a good sign the egg might be fertilized and developing but still in initial stages. Keep observing, as veins tend to become more prominent as the embryo grows.
However, if you see no veins at all, especially early in incubation, it generally indicates the egg is unfertilized. Proper lighting and dark room conditions improve visibility, helping you distinguish between faint veins and no veins.
Blood Ring Signs
A blood ring is a clear sign that something has gone wrong with the development of a fertilized egg. During candling, you’ll see a bright red, ring-shaped line around the embryo area, which indicates early embryo death.
This usually shows up between days 7 and 14 of incubation. The blood ring forms when blood vessels in the embryo break down, causing blood to collect in a ring. It’s a sign that the embryo has stopped developing.
When candling, spotting a blood ring means the egg isn’t viable. It’s best to remove such eggs to prevent contamination. Recognizing this sign helps you identify non-viable eggs early, so your incubation process stays on track.
Dark or Opaque Eggs
Dark or opaque eggs during candling can be tricky when you’re trying to check embryo development or fertility. A fully developed embryo often makes the egg look uniformly dark, especially in later stages, so veins or movement can be hard to see.
Thick shells or dense contents increase opacity, making it tougher to get a clear view. Sometimes, the embryo can also obscure internal details as it develops.
If an egg stays dark and opaque throughout incubation without showing veins or movement, it might mean the embryo has died or the egg was never fertilized. Proper lighting and technique are key.
Using too much light or placing the light poorly can cause glare and make the egg seem more opaque than it really is. This can lead to misjudging the egg’s fertility.
Recognizing these signs can help you avoid false conclusions about your eggs’ health and development.
How to Interpret Candling Results and Assess Embryo Health
When candling an egg, your goal is to spot specific visual cues that show whether the embryo is developing properly. Look for blood vessels spreading across the yolk—that’s a sign of healthy embryo growth.
By day 7 to 10, you should see a dark, spider-like embryo moving inside the egg, along with clear blood vessels. If the egg looks translucent with no veins or embryo signs, it’s probably infertile or has a non-viable embryo.
A blood ring around the yolk indicates early embryo death. Regularly compare what you see to an egg development chart to accurately judge embryo health and growth stages.
Recognizing these cues helps you manage incubation better and know which eggs might need to be discarded.
Preparing and Collecting Eggs for Incubation
To guarantee successful incubation, start by collecting eggs regularly, ideally every day. This helps keep them fresh and prevents accidental development.
Collect eggs daily to ensure freshness and increase hatch success.
When collecting eggs, pick ones that are clean, uncracked, and have smooth, unblemished shells. Avoid washing eggs before incubation because it can remove the protective bloom.
If cleaning is necessary, gently wipe with a dry or damp cloth. Store the eggs in a cool, dry place at about 55°F to keep them fertile until you’re ready to incubate.
Use a pencil to mark each egg with the collection date. This way, you can track their freshness and avoid handling them too much.
Proper collection and preparation help keep your eggs fertile and viable, which increases your chances of a successful hatch.
Monitoring Embryo Development From Day 1 to Hatching
As incubation progresses, you’ll notice early signs of growth, like tiny blood vessels and embryo development during candling.
By mid-stage, the embryo becomes larger with visible veins and even movement, confirming it’s thriving.
In the final days, candling shows a darker egg with more defined blood vessels, signaling that hatching is near.
Early Signs of Growth
Monitoring embryo development through candling lets you see early signs of growth from Day 1 to hatching. At first, you’ll notice a tiny, dark germinal disc or embryo on the yolk, along with faint blood vessels.
As days go by, blood vessels become more visible, showing active circulation inside the embryo. Around Day 7, you might see flickering movements or slight shifts, which indicate healthy development.
Between Day 10 and 14, the blood vessel network gets more intricate, filling much of the egg. The air cell at the wide end enlarges, providing oxygen and signaling that growth is progressing properly.
By Day 21, the embryo’s movements get stronger, and the egg darkens, which means it’s close to hatching. Tiny blood vessels form early, connecting the embryo to the yolk, and the germinal disc appears as a dark spot initially.
Over time, blood vessels become more prominent, and movement or flickering suggests the embryo is active. The increasing size of the air cell indicates that life inside the egg is developing well.
Mid-Development Indicators
Midway through incubation, you can see clear signs that the embryo is developing properly by candling the egg around days 7 to 14. During this time, you’ll notice visible veins branching across the inside of the egg, which shows healthy growth.
The embryo itself will look like a dark spot that gradually gets bigger, filling more of the egg’s space by day 10. As you continue candling, the blood vessel patterns become more defined, reflecting ongoing development.
Preparing for Hatching
Preparing for hatching involves closely tracking the embryo’s development throughout incubation to guarantee a successful hatch. To see inside fertilized eggs and check if they’re healthy, candle an egg between days 7 and 10. Look for veins and embryo movement to confirm ongoing growth.
Conduct a final candling on day 18, known as lockdown, to identify any non-viable eggs and ensure healthy development for hatch day. Maintaining proper temperature, around 99.5°F, and humidity, about 50-55%, helps support embryo development.
During hatching, avoid opening the incubator to preserve humidity and temperature. This gives the chick the best chance to hatch successfully. Proper monitoring and care are essential for a smooth hatching process.
Troubleshooting Fertility Issues and Improving Hatch Success
When facing fertility issues in your flock, figuring out the root cause and taking targeted steps can really improve hatch success. Make sure mating practices are proper and choose healthy roosters to boost fertilization rates.
Regular candling during incubation helps you spot non-fertile or dead embryos early, saving resources. Keep incubation conditions around 99.5°F and 50-55% humidity for healthy embryo development.
Collect eggs often and remove infertile ones promptly to prevent contamination. Address environmental and behavioral factors like providing enough nesting space and reducing stress to increase fertility.
Use this table to troubleshoot common issues:
| Issue | Solution |
|---|---|
| Low hatch rate | Improve mating practices |
| Non-fertile eggs | Increase rooster fertility |
| Poor embryo development | Maintain proper incubation conditions |
| Contamination | Remove infertile eggs promptly |
Frequently Asked Questions
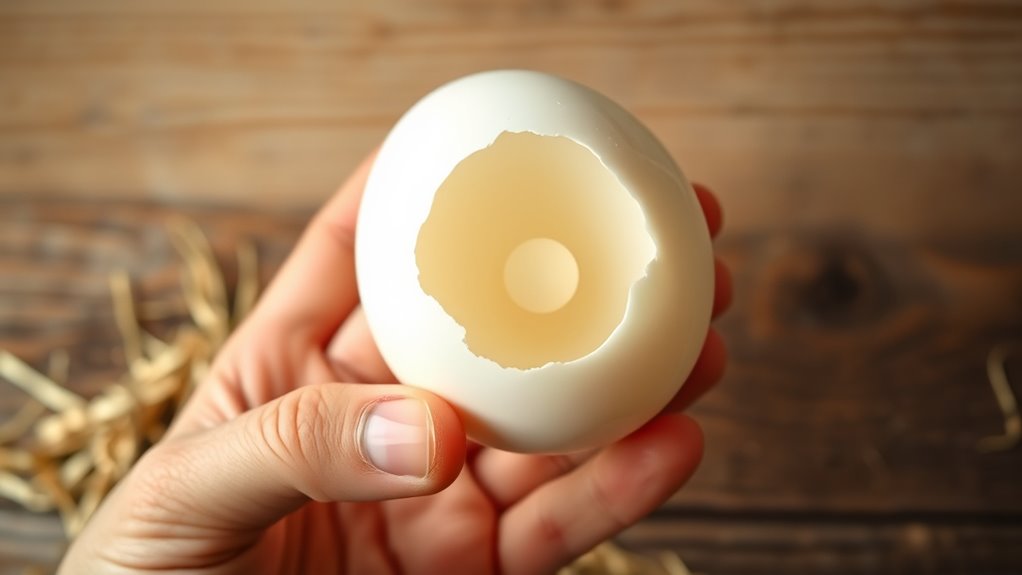
How to Determine if Chicken Eggs Are Fertile?
You can tell if chicken eggs are fertile by candling them with a bright light. Look inside for veins or a developing embryo, which means the egg is fertilized.
Check for a small white germinal disc. If it’s larger and has a bullseye or spider-like blood vessels, the egg is fertilized.
Alternatively, crack the egg open. A larger white spot with a bullseye pattern confirms that it was fertilized.
How to Tell if an Egg Is Fertile With a Flashlight?
To tell if an egg is fertile with a flashlight, hold the egg in a dark room and shine the light through it.
Look for tiny blood vessels or a dark spot, called the embryo or bullseye, which shows the egg is fertilized.
If the yolk looks clear and translucent without vessels, it’s probably unfertilized.
Repeating this process at different times can help you confirm whether the egg is fertilized or not.
How to Candle an Egg for Fertility?
To candle an egg for fertility, hold it in a dark room and shine a bright light against it. Look for blood vessels and a dark, spider-like embryo inside.
Check the germinal disc, which appears as a small white spot; a larger ring indicates fertilization.
During days 7 to 10, watch for veins and movement. This helps confirm embryo development and fertility effectively.
How to Confirm if an Egg Is Fertilized?
To confirm if an egg is fertilized, look for a larger germinal disc with a bullseye pattern when cracking it open.
During candling around days 7-10, you’ll see blood vessels and possibly movement, which shows fertilization and embryo development.
If you don’t see veins or an embryo, the egg is probably unfertilized.
These signs can help you figure out if the egg is fertile or not.
Conclusion
Now that you know how to tell if your eggs are fertile, you’re on the right path to nurturing new life. With patience and a gentle touch, you’ll start noticing the early signs of growth.
Helping your eggs develop into healthy chicks is a rewarding process. Keep observing and caring for them as they begin their journey.
Remember, every step you take with your eggs brings a little more sunshine into their future. Focus on the signs of fertility and stay attentive.
Enjoy the quiet miracle happening right beneath your fingertips. Your care makes all the difference in helping your chicks find their way into the world.