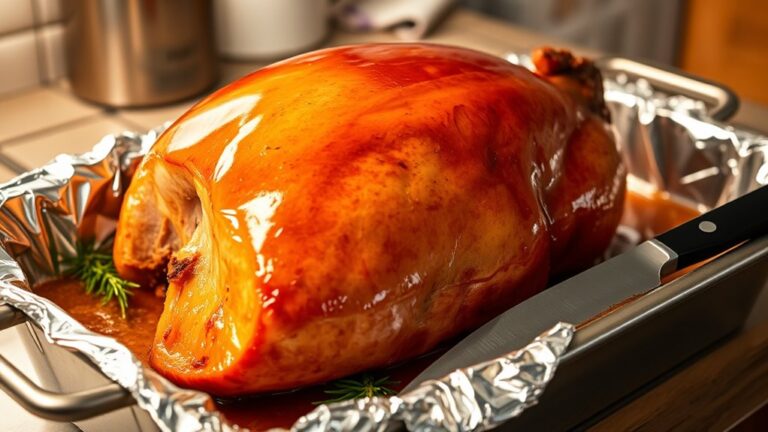
How Long to Pressure Cook Roast Beef Step by Step
Many home cooks want to enjoy tender, flavorful roast beef without spending hours in the kitchen. If you’ve ever felt frustrated by tough, dry meat or unsure about the best cooking method, you’re not alone. Pressure cooking can be the game-changer you need for perfect results every time.
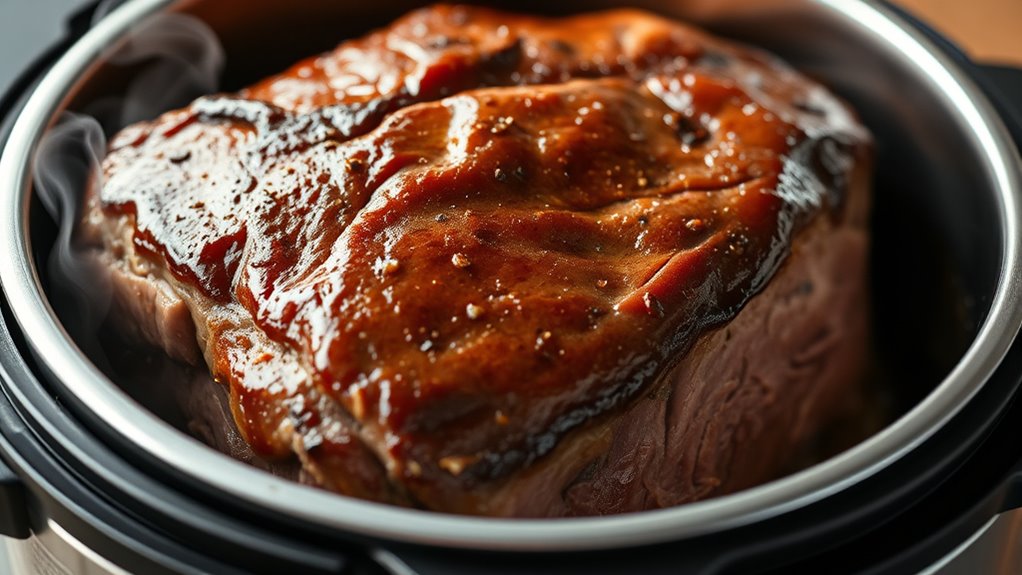
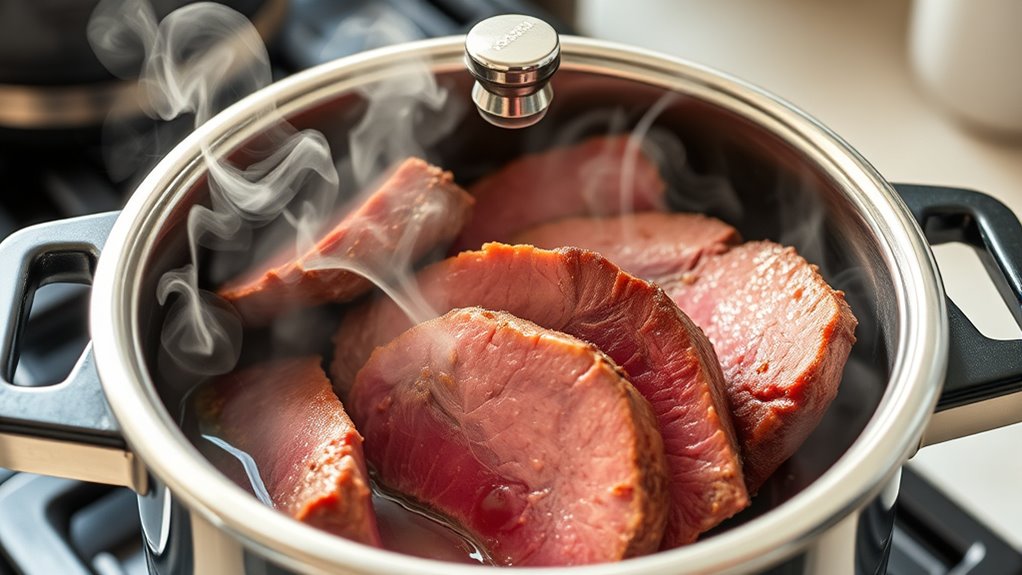
To pressure cook roast beef, start by selecting a cut between 3-4 pounds and searing it first for flavor.
For thawed meat, cook on high pressure for 60-75 minutes, adding 20-30 minutes if frozen.
Use enough broth to keep it moist, and release pressure naturally for the best tenderness.
Keep an eye on the internal temperature and let the roast rest before slicing.
Want more detailed steps? Keep exploring to perfect your technique.
Key Takeaways
- Measure the roast’s weight and thickness to figure out the right cooking time. Usually, for a 3-4 pound roast, it takes about 60-75 minutes.
- If your meat is frozen, make sure to thaw it first. Add an extra 20-30 minutes to the regular cooking time for the best results.
- Be sure to use enough broth or liquid. This keeps the meat moist and prevents it from drying out during pressure cooking.
- Searing the roast beforehand adds a lot of flavor and keeps it juicy. After searing, cook it at high pressure for the recommended time.
- Once cooking is done, let the pressure release naturally. Then, let the meat rest for about 10 minutes. This step helps make the meat more tender and juicy.
How Long to Pressure Cook Roast Beef for Tender Results?
To get tender roast beef in a pressure cooker, the cooking time mainly depends on the size and thickness of the cut. For a 3- to 4-pound roast, plan for about 60 to 75 minutes at high pressure to make it tender.
If your roast is larger or thicker, it might need up to 80 minutes. Smaller or thinner cuts can be ready in around 50 to 60 minutes. For frozen roasts, just add 20-30 minutes to the usual cooking time.
Always make sure the internal temperature hits at least 145°F for safe, tender beef. Letting the pressure release naturally for 10-15 minutes helps keep the meat moist and tender.
What Affects the Cooking Time in a Pressure Cooker?
Several factors influence how long you need to pressure cook a roast beef, and understanding these can help you achieve perfect tenderness. The size and thickness of the cut are important—larger or thicker pieces need more cooking time.
The type of cut also matters. Fattier cuts like chuck and those with more connective tissue, such as round, will take longer to become tender. If you’re starting with frozen meat, add an extra 20-30 minutes since it takes longer to reach the right temperature.
The amount of liquid in the pressure cooker and the initial temperature of the meat can also impact cooking efficiency. By keeping these factors in mind, you’ll better know how long to cook your roast beef for the best results.
Choosing the Right Cook Time Based on Roast Size and Cut
Your roast’s size and cut really affect how long it takes to cook it tenderly. Larger or tougher cuts need more time in the pressure cooker, while smaller, more tender cuts cook faster.
Adjust your cooking time based on these factors. Always check for doneness before serving to make sure it’s just right.
Roast Size Variations
The size and cut of your roast really impact the pressure cooking time needed for tender, flavorful meat. Larger roasts, like a 5-pound chuck, usually need about 70-80 minutes, while smaller 3-pound cuts take around 60-70 minutes.
Thicker or denser cuts need more time, but thinner or tender cuts cook faster. Cutting a large roast into smaller, even pieces can help reduce cooking time and promote more uniform tenderness.
Keep in mind, frozen roasts take an extra 20-30 minutes of pressure cooking compared to thawed meat. Adjusting the cooking time based on roast size helps avoid overcooking or dryness.
| Roast Size | Typical Pressure Cooking Time |
|---|---|
| 3 pounds | 60-70 minutes |
| 5 pounds | 70-80 minutes |
| Frozen | +20-30 minutes |
Cut Type Considerations
Choosing the right cook time really depends on the cut type and its size, as these factors affect how quickly the meat becomes tender. Different cuts need different pressure cooking times to reach that perfect tenderness.
For example, thicker cuts like chuck roast usually need about 75-80 minutes. Thinner cuts might only need 60-70 minutes. Larger roasts over 4 pounds could require an extra 10-15 minutes compared to smaller cuts.
Smaller, uniform pieces like sliced or cubed beef can be pressure cooked in 30-45 minutes, depending on how tender you want it. Leaner cuts like eye of round tend to dry out faster and may do better with shorter times around 60 minutes.
Adjusting your pressure cooking time based on the cut’s thickness and size helps ensure great results every time.
Adjusting Cooking Duration
Adjusting the cooking duration based on roast size and cut is key to getting tender, flavorful meat. The right pressure time depends on your roast’s weight and thickness.
For larger roasts, like a 4-5 pound chuck, aim for 70-80 minutes of pressure cooking. Smaller or thinner cuts, such as a 2-pound roast, usually need just 45-60 minutes.
Frozen roasts take longer—about 20-30 minutes extra—to reach the same tenderness as thawed meat. The fat content also matters: fattier cuts benefit from longer pressure, while leaner cuts need less.
Adjusting the cooking time like this ensures your roast stays moist and tender without overdoing it.
How to Adjust Cooking Time for Frozen vs. Thawed Roast?
When cooking a roast beef from frozen, you’ll need to extend the cooking time compared to thawed meat because frozen roasts take longer to reach the right internal temperature.
In a pressure cooker, this usually means adding about 20 to 30 minutes to the usual cooking time.
For example, if a thawed roast takes 60-80 minutes, a frozen one of similar size might need around 80-110 minutes.
Skipping searing and seasoning right away can save time, but always use a meat thermometer to make sure the roast is cooked to a safe temperature.
Keep in mind that a frozen roast won’t develop the browned exterior that a thawed one does.
However, the longer pressure cook time will make up for the lack of initial browning.
How to Tell When Your Roast Is Done: Visual and Temperature Cues?
Knowing how to tell when your roast is done ensures you serve it at the right doneness without overcooking or undercooking. The best way is to check the internal temperature with a meat thermometer: 145°F for medium-rare or 160°F for medium.
Visual cues also help. Look for clear juices when piercing with a fork and pay attention to the meat’s color. A medium-rare roast shows a pink center, while a well-done one is uniformly brown or gray.
Resting the roast for 10 minutes allows the juices to settle. This step improves tenderness and enhances the visual appearance. Use the table below to understand doneness levels and their cues:
| Doneness | Internal Temp | Visual Cue |
|---|---|---|
| Rare | 125°F | Bright red center |
| Medium-rare | 135°F | Pink with reddish juices |
| Medium | 145°F | Slightly pink, clear juices |
| Medium-well | 150°F | Light pink, minimal juices |
| Well-done | 160°F+ | Brown or gray, no pink |
Common Mistakes That Can Make Your Roast Undercooked or Dry
One common mistake is overestimating the cooking time, which can dry out or toughen your roast. Using too little or too much liquid can lead to uneven cooking or dryness, affecting moisture retention.
Rushing the process by not letting the pressure release naturally or skipping the resting period can also cause your meat to stay undercooked or turn out dry. Taking your time really makes a difference in the final result.
Overestimating Cooking Time
Overestimating the cooking time for pressure-cooked roast beef often results in dry, tough meat. When you extend pressure time unnecessarily, the beef loses moisture, making it dry and unappetizing.
Overcooking also causes the connective tissues to break down too much, which can make the roast crumbly and stringy instead of tender. Relying only on generic recipe times without adjusting for roast size, cut, or if the meat is frozen can cause issues too.
For example, a small or tender cut doesn’t need as long, and too much pressure time risks overcooking. To avoid this, follow recommended timings—like 60-75 minutes for a thawed 3-4 pound chuck roast—and keep an eye on the meat’s doneness to prevent overcooking and dryness.
Using Insufficient Liquid
Using too little liquid in your pressure cooker can lead to uneven cooking and dry, underdone meat. If there’s not enough liquid, the cooker can’t produce enough steam, which is key for tenderizing the roast evenly.
When you use less than the recommended 1 to 1.5 cups of liquid, the cooker might struggle to reach or maintain the right pressure. This can cause incomplete cooking and dry, tough meat.
Without enough moisture, the meat can turn out dry and hard. Plus, the cooker might trigger safety mechanisms or fail to build pressure properly.
Using enough liquid ensures the roast cooks thoroughly and helps create flavorful gravy from the cooking juices. Always measure your liquid carefully to avoid undercooked or dry roast beef.
Not Resting the Meat
Failing to let your roast rest after pressure cooking can cause it to become dry and less flavorful. Resting lets the juices redistribute throughout the meat, making it more tender and moist.
If you skip this step, the juices will escape when you cut into the roast, leaving it dry and less tasty. Cutting into the meat right away prevents the collagen and juices from settling, which results in a tougher texture.
Giving your roast at least 10 minutes to rest helps it stay tender and keeps its natural moisture. Rushing this process can also cause uneven cooking, with dry edges and undercooked centers.
Always let your meat rest so the juices can settle. This simple step produces a juicier, more flavorful, and tender roast.
Step-by-Step: Timing Your Pressure Cooker Roast Beef
To get perfectly tender roast beef in your pressure cooker, timing is everything. For a 3- to 3.5-pound beef roast, pressure cook on high for 60 to 75 minutes.
Make sure to thaw the meat first for more accurate timing. If the beef is frozen, add an extra 20 to 30 minutes to the cook time.
After cooking, let the pressure release naturally for about 10 minutes. This helps keep the meat juicy and tender.
Overcooking can dry out the beef, so stick to the recommended time based on your roast’s size. If you’re adding vegetables like potatoes or carrots, include an extra 8 to 15 minutes.
Here’s a quick reference table:
| Roast Size | Pressure Cook Time | Additional Veg Time |
|---|---|---|
| 3-3.5 lbs | 60-75 mins | 8-15 mins |
| Frozen | +20-30 mins |
Tips for Juicy, Tender Roast Every Time
Achieving juicy, tender roast beef starts before the pressure cooking process itself. To get the best results, sear the beef first to develop flavor and lock in juices.
Use enough beef broth or a mix of broth and Worcestershire sauce to keep the meat moist during pressure cooking. A well-hydrated environment helps prevent drying out and boosts tenderness.
Make sure the pressure cooker reaches high pressure for thorough cooking. Cook for about 60-75 minutes for a 3-pound chuck roast.
Use natural pressure release for 10-15 minutes to help retain moisture. Adjust the cooking time based on the size and thickness of your meat.
Following these tips will keep your roast juicy and tender, with the beef broth working alongside pressure to lock in flavor and moisture.
Frequently Asked Questions
How Long Do You Cook a Beef Roast in a Pressure Cooker?
You should cook a beef roast in a pressure cooker for about 75 minutes if it’s thawed, using high pressure.
For frozen roasts, add roughly 20-30 minutes, making it around 90-110 minutes total.
Smaller cuts need less time, around 60 minutes, while larger, thicker ones may require up to 80 minutes or more.
Always check that the internal temperature hits 145°F or 160°F for safety.
How Long Does It Take to Cook Beef in a Pressure Cooker?
It takes roughly 60 to 75 minutes to cook beef in a pressure cooker. That’s enough to turn even the toughest cut into tender, melt-in-your-mouth perfection.
For smaller or thinner cuts, 45 to 60 minutes usually does the trick. Larger or frozen roasts may need up to 80 minutes.
Always remember to let the pressure release naturally for 10 to 15 minutes. This helps lock in all that juicy goodness.
How Long to Cook a 4 Lb Roast in the Pressure Cooker?
You should pressure cook a 4 lb roast for about 60 to 70 minutes on high pressure.
Make sure the roast is fully thawed for even cooking and better tenderness.
After cooking, let the pressure release naturally for at least 10 minutes to keep the meat moist.
If you’re adding vegetables like potatoes or carrots, add another 10-15 minutes to the cooking time.
Adjust the time slightly depending on the thickness of the meat or how tender you want it.
Do I Need to Sear the Roast Before Pressure Cooking?
You don’t have to sear the roast before pressure cooking, but it does add more flavor and gives the meat a richer color and aroma.
Searing helps develop caramelization and can lock in juices, which improves the texture.
If you skip it, the meat will still cook tenderly, but it might lack that deep flavor and appealing crust.
Searing is quick—only about 5-10 minutes—and can make a big difference in how your dish turns out.
Conclusion
Mastering pressure-cooked roast beef means paying close attention to timing and cues. For example, if you’re cooking a 3-pound cut, sticking to the recommended time ensures tenderness without drying out the meat.
Imagine a dinner where your perfectly cooked roast impresses everyone—timing made simple. With practice, you’ll confidently adjust based on size and cut, creating juicy, flavorful results every time.
So, trust the process, and soon you’ll be the go-to cook for tender roast beef. Proper timing in pressure cooking makes all the difference in achieving that ideal, juicy roast.