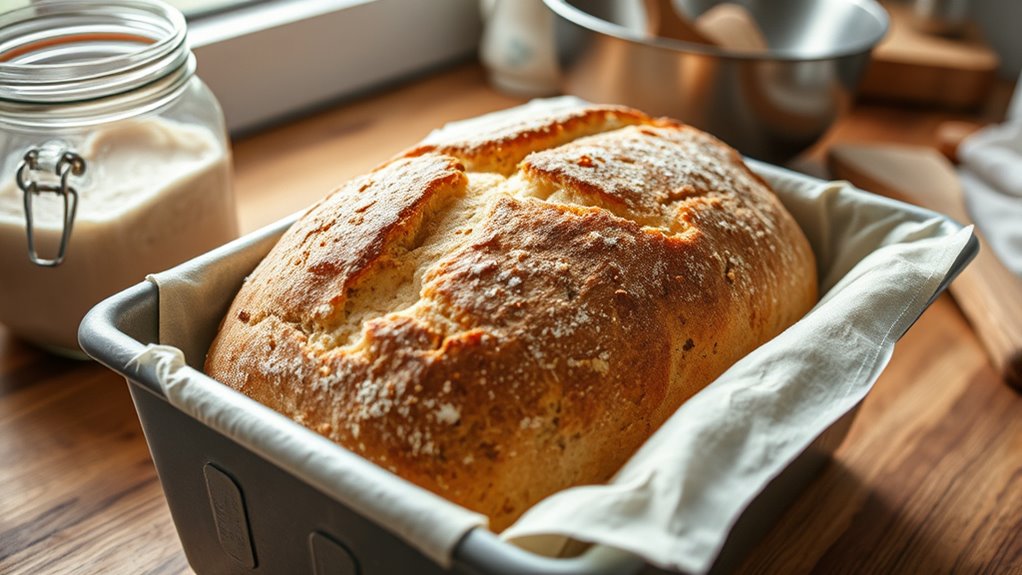
How You Can Make Sourdough Bread in a Loaf Pan Step-by-Step
Many home bakers dream of making perfect sourdough bread, but often struggle with achieving that professional look and texture. You’re not alone—getting that crust just right and shaping the loaf can be tricky.
To make sourdough bread in a loaf pan, start by turning your finished dough onto a floured surface and gently shaping it into a tight log, pressing out air bubbles.
Place the dough seam-side down in a well-prepared, oiled or floured pan, then proof until it doubles in size and passes the finger poke test.
Create steam during baking for a crispy crust, and cool the loaf before slicing.
Keep going to uncover all the tips for perfect results.
Key Takeaways
- Carefully turn the finished dough onto a floured surface. Shape it into a taut loaf, supporting it with oiled or floured hands.
- Place the shaped dough seam-side down into a well-prepared, lightly oiled or floured 9×5-inch loaf pan.
- Cover the pan and let the dough proof at room temperature until it has doubled in size. To check if it’s ready, do the finger poke test—if the indentation slowly springs back, it’s good to go.
- When it’s ready, bake in a preheated 425°F oven. For a nice crust, add steam during the first 10-15 minutes—either by using a water pan or misting the oven with water.
- Once baked, cool the loaf on a wire rack for at least 30 minutes. This helps develop the crust and crumb texture, making sure slices are perfect.
How to Prepare Your Sourdough Dough for Pan Baking
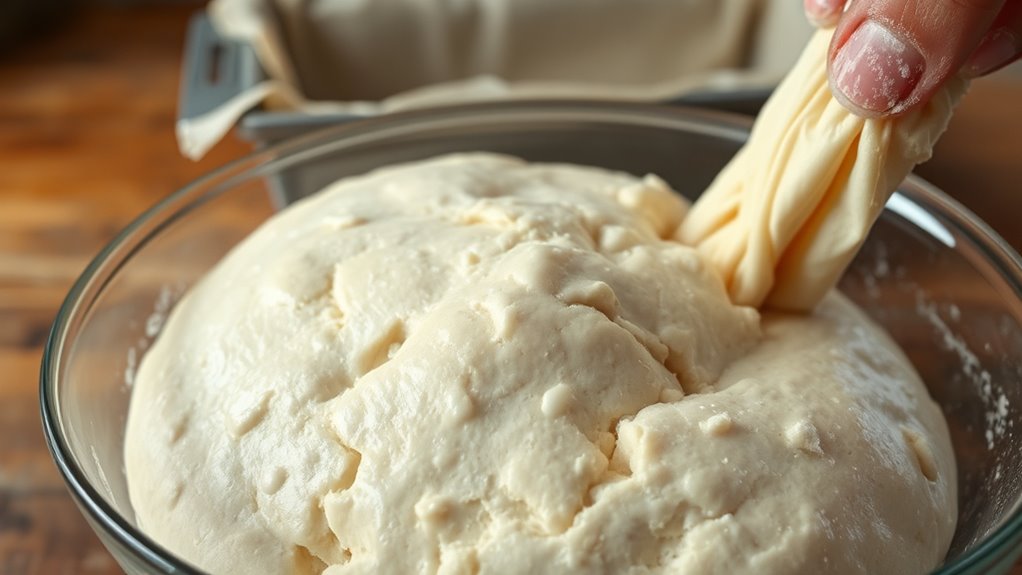
After your sourdough has finished its bulk fermentation, carefully turn it out onto a floured surface. Gently perform a few stretch-and-folds to reinforce the gluten structure, making the dough easier to shape.
Shape the dough into a rectangle, then roll it into a tight log. Press out any air bubbles and create surface tension for a smooth top. This tension helps the loaf hold its shape during proofing.
Lightly oil or flour your loaf pan, then place the shaped dough seam-side down into the pan, ensuring it fits snugly. Cover it with a damp cloth or plastic wrap and let it proof until it reaches the rim of the pan, about 5-6 hours at room temperature.
Proper shaping and proofing set the foundation for a perfect sourdough loaf.
Choosing the Right Loaf Pan and Tools for Sourdough
Selecting the right loaf pan is key to baking a perfect sourdough loaf. It affects heat distribution and helps develop that beautiful crust.
Choosing the right loaf pan ensures even baking and a beautifully crusted sourdough.
For consistent results, go with a standard 9×5-inch metal bread pan. Metal conducts heat evenly, giving you reliable baking.
A glass loaf pan can work too, but you might need to adjust the baking time since it retains heat differently.
Choose a pan with straight sides and a flat bottom. This helps with shaping and makes removal easier.
Avoid pans with reactive coatings like non-stick Teflon. They can interfere with crust formation and overall texture.
Having the right baking tools and pan size will help you get a crusty, evenly crumbed sourdough loaf every time.
How to Shape and Place Your Sourdough in the Pan
Start by gently turning your fermented dough onto a floured surface with a bench knife to prevent sticking.
Shape the dough into a log or oval by folding the sides inward and then rolling it into a snug shape.
Carefully place it seam-side down into a prepared loaf pan, making sure it fits well and maintains its shape.
Proper Dough Handling
Gently turning your fermented dough onto a floured surface helps prevent sticking and keeps its structure intact.
For shaping, fold the sides toward the center to create surface tension, which helps the loaf hold its shape during proofing. Lightly dust the top of the shaped dough with flour to stop it from sticking when you transfer it.
Use oiled hands to carefully handle and transfer the dough seam-side down into a greased or parchment-lined loaf pan. Proper handling ensures even placement and minimizes degassing.
Once in the pan, cover it and let the dough proof until it reaches the pan’s rim. This signals it’s ready for baking. Handling the dough carefully during this stage promotes a nice, even rise and a well-formed sourdough loaf.
Shaping Technique Essentials
When shaping your sourdough, the goal is to create a smooth, taut surface that will hold its shape during proofing and baking. To do this, gently turn the fermented dough onto a floured surface using a bench knife to prevent sticking.
Fold the sides toward the center, then roll gently to develop surface tension, shaping the dough into a tight oval or rectangle. Use oiled or floured hands to support the dough, keeping it taut and smooth.
Place the shaped dough seam-side down into a prepared loaf pan, pressing gently to ensure even contact. For best results, do a final shaping by pulling the dough snugly into the pan, then cover and proof until it reaches the rim.
Maintain consistent surface tension through folding and rolling. Support the dough with gentle, floured hands to keep it smooth and taut.
Create a smooth, taut surface for an ideal shape. Shape into a tight oval or rectangle for support. Press gently into the pan for even contact.
Correct Pan Placement
After shaping your dough into a tight, smooth oval or rectangle, carefully transfer it seam-side down onto a floured surface.
For proper pan placement, gently lift and transfer the dough into a buttered or lightly floured loaf pan, making sure the seam stays on the bottom. This helps the loaf keep its shape during proofing.
When placing the dough in the pan, press it lightly into the corners without stretching or tearing the surface. This encourages even oven spring.
Cover the pan with a damp towel or plastic wrap and let it proof until it reaches the rim of the pan.
Getting the pan placement right is key to a uniform rise and a beautifully shaped sourdough loaf.
Proofing Tips for a Perfect Rise in a Loaf Pan
To get the best rise, make sure your dough has doubled in size and feels jiggly before placing it in the pan. Keep an eye on the proofing time, aiming for about 4-6 hours at room temperature, or refrigerate overnight for a stronger lift.
Check for a slight indentation when pressed. If it springs back slowly, your dough is ready to bake.
Proper Dough Handling
Achieving a perfect rise in your loaf pan starts with proper dough handling and proofing. Begin by shaping your dough into an oval or rectangle and lightly dust it with flour to prevent sticking.
Well-shaped dough encourages even fermentation and better gluten development. During proofing, keep an eye on the rise—your dough should double in size, look puffed and jiggly, and when you gently press it, a slight indentation should remain.
Use a gentle finger poke test to check if it’s ready. Make sure to proof in a warm, draft-free spot to avoid overproofing, which can cause the dough to collapse.
Proper dough handling helps control fermentation, resulting in a loaf with good structure and excellent oven spring.
Optimal Proofing Environment
Creating the ideal environment for proofing your sourdough guarantees your loaf reaches its full potential. Keep the room temperature around 75°F (24°C) to promote maximum yeast activity and dough expansion.
Cover your dough with a damp cloth or plastic wrap to keep the humidity high. This prevents the surface from drying out and helps the dough rise better.
Proof until the dough doubles in size and feels jiggly when gently shaken. This usually takes about 4 to 6 hours. If your space is colder, extend the proofing time or use a proofing box set to 80°F (27°C) for a full, airy rise.
Be careful not to over-proof. Stop proofing when the dough has expanded about 50% beyond its original size. This ensures it keeps its structure during baking.
Recognizing Ready Stage
Knowing when your dough is properly proofed is key to a perfect loaf. To recognize the ready stage, check if the dough has nearly doubled in size and feels jiggly, with a slight domed top indicating good oven spring potential.
Perform the poke test by gently pressing with your finger. The indentation should remain but slowly spring back, showing that the dough is adequately proofed. It should also exhibit a slight spring when pressed, signaling it’s ready for baking.
Over-proofed dough may collapse or feel overly soft, while under-proofed dough will be dense and not fully risen. Look for a slight spring and proofed structure to ensure your bread turns out just right.
How to Generate Steam for Crispy Crust and Good Oven Spring
Generating steam during baking is crucial for getting that crispy crust and good oven spring. You can create steam by placing a preheated water pan or a tray of ice cubes in the oven during the first 10-15 minutes of baking. This boosts steam production, keeping the crust moist at first and helping the bread expand fully.
Misting the dough with water before baking also helps develop a better crust. Covering the loaf with a lid, Dutch oven, or aluminum foil traps steam around the bread, making it rise more and improving the crust texture.
Once the initial baking phase is over, remove the cover or water source. This allows the crust to crisp up and brown properly, resulting in a beautifully crispy crust and a well-risen loaf.
Step-by-Step Guide to Baking Sourdough in a Loaf Pan
Baking sourdough bread in a loaf pan is pretty straightforward if you follow the right steps. First, mix your active sourdough starter with water, flour, and salt, then do stretch and folds every 30 minutes over two hours to develop the gluten.
Shape the dough into an oval or rectangle, then place it into a greased loaf pan. Let it proof until it reaches the rim of the pan, which takes about 4-6 hours at room temperature, during which the second rise happens.
Preheat your oven to 425°F and add steam for that perfect crust. Bake the bread uncovered for 40-45 minutes until the crust is golden brown and the internal temperature hits 206-210°F.
Once baked, cool the loaf on a wire rack for at least 30 minutes before slicing.
How to Cool and Slice Your Sourdough for Best Texture
Allow the bread to cool completely on a wire rack for at least 30 minutes after removing it from the oven. This cooling period lets moisture escape, helping the crust firm up and preventing a gummy crumb.
When you’re ready to slice, use a sharp serrated knife and gently saw through the crust from top to bottom. Slicing too soon while the bread is warm can tear the crumb and squish the loaf, ruining the texture.
Resting guarantees the crumb is set and the crust stays crisp. Take your time to slice carefully, starting from the crust and working into the crumb.
Proper cooling and slicing preserve the bread’s ideal texture, making each piece perfect for enjoying the full flavor and crunch of your sourdough.
Troubleshooting Common Sourdough Baking Problems
When sourdough bread doesn’t turn out as expected, identifying the issue is essential for fixing it. Underproofed dough can lead to a dense loaf with poor oven spring and a tight crumb, while overproofed dough might collapse or taste excessively sour.
Uneven crust coloring or burning could be due to the wrong oven temperature or leaving the loaf uncovered for too long. Sticky or overly wet dough suggests insufficient gluten development or hydration control, making shaping tricky.
To troubleshoot, try adjusting proofing times based on how the dough looks and feels. Keep an eye on oven temperature to get an even crust. Watch the oven spring so the loaf doesn’t collapse.
Improve gluten development through proper kneading, and keep hydration levels consistent to avoid sticky dough. Addressing these factors will help you bake a loaf that’s well-risen, flavorful, and has a perfect crust.
Flavor Variations and Add-ins for Your Loaf Pan Sourdough
You can customize your loaf pan sourdough with various flavor add-ins to suit your taste. Try adding herbs, spices, or savory ingredients like cheese and olives for extra flavor.
Feel free to experiment with dried fruits and nuts for a sweet twist. Using different flours or flavored liquids also helps create unique, delicious variations.
Incorporating Flavorful Add-ins
Adding flavorful add-ins to your sourdough bread can turn a simple loaf into a tasty, complex treat. During dough mixing and folding, you can stir in herbs like rosemary, thyme, or basil to add aroma and depth.
You can also fold in small goodies like chopped olives, sun-dried tomatoes, or shredded cheese before shaping the dough. This ensures an even distribution of flavor throughout the bread.
Dried fruits such as cranberries, raisins, or apricots can be added during the final stretch of kneading. They boost sweetness and give the bread a nice texture.
Spices like cinnamon, nutmeg, or seeds such as flax, sesame, or poppy seeds add crunch and extra flavor complexity to your loaf.
To finish, brush the crust with infused oils or butter after baking for a rich, moist finish that enhances all those flavors.
Using Different Types of Flours
Curious how different flours can change your loaf pan sourdough? Trying out varieties like whole wheat or rye flour adds richer flavors and makes a denser crumb, perfect for hearty bread.
Flour substitution is a great way to experiment with options like spelt, einkorn, or millet. These create unique sourdough variations that can surprise you.
Mixing different flours—like bread flour with whole wheat or rye—can boost both texture and flavor. Using more bread flour makes the loaf chewier with a stronger gluten structure, ideal for a sturdy bread.
Don’t forget, blending flours can also enhance nutritional value and introduce new flavor profiles. Try different types to discover your favorite characteristics and expand your sourdough skills.
Enhancing With Herbs and Spices
Enhancing your loaf pan sourdough with herbs and spices is an easy way to boost flavor and add visual appeal. Incorporate finely chopped herbs like rosemary, thyme, or basil into the dough during the stretch-and-fold phase for even distribution.
Mix dried herbs or spices such as garlic powder, onion powder, or smoked paprika into the flour before combining with the starter and water to ensure they’re evenly integrated throughout the loaf.
Fold in flavorful ingredients like shredded cheese, chopped olives, or sun-dried tomatoes during shaping to create tasty inclusions. For added aroma and decorative flair, sprinkle fresh herbs or spices on top of the loaf just before baking.
These simple steps will heighten your sourdough with complex flavors and a sophisticated appearance.
Storing and Freezing Your Sourdough Bread for Freshness
Once your sourdough bread has cooled completely on a wire rack, proper storage is key to keeping it fresh. For short-term storage, keep the bread in a paper bag, cloth bread bag, or loosely wrapped in a tea towel at room temperature for up to five days.
For longer preservation, slice the bread and freeze it in airtight containers or resealable bags for up to two months. Avoid refrigerating, as it speeds up staling. To maintain freshness, thaw frozen slices directly in a toaster or at room temperature.
Use the following table to help you choose the best storage method:
| Storage Method | Best Use | Tips |
|---|---|---|
| Room temperature | 1-5 days | Use breathable wrapping |
| Freezing | Up to 2 months | Seal tightly in airtight containers |
| Refrigeration | Not recommended | Accelerates staling |
Tips for Achieving the Best Oven Spring and Crust
After you’ve stored your sourdough bread properly, it’s time to focus on getting the best oven spring and crust during baking. Start with a hot oven, around 450°F, to create steam and give the dough a quick heat shock that helps it rise.
Use a water pan or spray to add steam during the first 10-15 minutes. This supports crust development and helps the dough expand fully. Proper scoring allows controlled oven spring and prevents unexpected bursting.
Make sure your proofed dough is fully risen so gases can expand completely during baking. Baking in a preheated loaf pan with a tight lid traps steam, giving you a crusty exterior and more pronounced oven spring.
Remember to use high heat and steam for the best oven spring. Preheat your loaf pan thoroughly to trap that steam effectively. Score the dough just before baking to control how it expands.
Ensure your dough is fully proofed before baking, and keep your oven at a consistent temperature. These simple steps will help you get that perfect crust and rise every time.
Frequently Asked Questions
How Do I Cook My Sourdough in a Loaf Pan?
To cook your sourdough in a loaf pan, start by preheating your oven to 425°F. Prepare the pan with butter or parchment paper so the bread doesn’t stick.
Shape your proofed dough into a loaf and place it seam-side down in the pan. Let it rise until it reaches the top of the pan.
Bake uncovered at 425°F for 20-25 minutes. Then lower the temperature to 375°F and continue baking until the bread is golden and the internal temp hits 206-210°F.
Once done, cool the bread before slicing so it finishes setting. Enjoy your homemade sourdough!
Is Sourdough Bread Better for Diabetics?
Yes, sourdough bread can be better for diabetics because it has a lower glycemic index, which helps prevent blood sugar spikes. Its fermentation process breaks down starches and gluten, making it easier to digest and potentially improving insulin sensitivity.
Just remember to watch portion sizes and choose whole grain or rye options, as some commercial sourdoughs still contain high carbs and sugars.
Is Sourdough Bread Good for Hypertension?
Yes, sourdough bread can be good for hypertension. It offers lower sodium content, which helps control blood pressure.
Its fermentation process reduces phytates, improving mineral absorption that supports heart health. Plus, its probiotics may boost gut health and help regulate blood pressure.
You should still check labels or bake your own to make sure it fits your low-sodium diet, making it a better choice for managing hypertension.
Can Hashimoto’s Eat Sourdough Bread?
Yes, you can eat sourdough bread if you have Hashimoto’s, but it depends on your individual tolerance. Sourdough’s fermentation can reduce gluten and antinutrients, making it easier to digest and potentially less inflammatory.
However, if you’re sensitive to gluten, it’s best to choose gluten-free flours. Always check with your healthcare provider or dietitian to see if sourdough fits into your personalized thyroid management plan.
Conclusion
Baking sourdough in a loaf pan is like nurturing a tiny garden. You plant your dough, give it time to grow, and watch it transform into a beautiful loaf.
With patience and the right techniques, each slice tells a story of flavor and effort. Just like a gardener tends their plants, your care will create a crust that crackles and a crumb that’s tender and inviting.
Making sourdough in a loaf pan is a simple, rewarding process. It’s perfect for those who want a neat shape and a soft interior.
Enjoy the process and the delicious benefits of your homemade sourdough loaf. Happy baking!